
Newsletter Subscribe
Enter your email address below and subscribe to our newsletter
Enter your email address below and subscribe to our newsletter
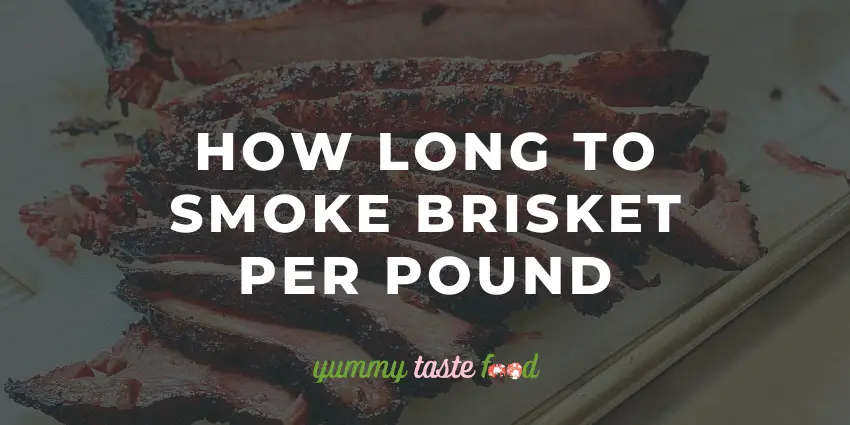
How long does it take to smoke briskets per pound? On average smoking a brisket for one hour for each pound, at 225 degF. This means that if you have a 10lbs brisket (before trimming) then you’ll have to cook the cut and seasoned brisket for around 8-10 hours.
Smoking brisket might seem like a process reserved for chefs only but it’s actually very simple if you follow all the correct steps.
I used to be a chef for over 12 years and worked in some of the world’s leading hotels and restaurants. Preparing smoked brisket reminds me of when I worked in The Savoy Hotel in London, on the lunch menu we usually featured a smoked brisket salad which was one of our most popular dishes.
I had never prepped a smoked brisket before but it didn’t take too long before I could with my eyes closed!
There are more things to think about other than smoking time! Learn more about how to smoke brisket like a pro if you read my guide!
A lot of people focus on how they “feel” about the meat when cooking briskets, and although this approach could work for experts who have cooked plenty of briskets, no one is able to cook it perfectly on the very first attempt!
In making a great brisket everything is about temperature and timing and patience. It is essential to ensure that these factors are set before you cook the meat.
We’ll take a look at each in detail however, first we’ll talk about cooking meat with smoke.
Smoking has been a part of human culture for their meat for centuries. There’s no definitive starting date for this method of cooking however, most historians think that we began smoking food at the time that people first began living in caves.
Smoking is regarded as an excellent cooking method due to the fact that it slow cooks, tenderizes, and enhances the flavor of the meat. Even though it is more time-consuming than normal, this method makes food more delicious and tasty!
Meat can be smoked using BBQ pits or on a specific smoking grill. Both use the same method: they make use of fuel (wood pellets, coal, pellets) and send the smoke and heat towards the Brisket.
The great thing about this method of cooking can be that you don’t need many ingredients to prepare a slice of outstanding-tasting brisket.
In the majority of cases, purists swear by using only salt and pepper to flavor the Brisket. Some may prefer some garlic or a mix of herbs and spices. It’s true that seasonings make up only a quarter of what creates a fantastic Brisket.
These are the most important phases of cooking the brisket:
Before you start cooking on the grill, you need to start by finding an exquisite Brisket.
Go to your local butcher shop and ask them to cut this for you. It is also possible to purchase Cryovac Briskets as well! For the majority of people, any USDA-approved brisket can be an excellent place to start.
The brisket is made from the chest or breast portion of cows. even though every cow is different. It is possible to expect at least the same features in each brisket. For instance, each brisket will feature the “point” and “flat” sections.
“Point” or “point” section is the densest and fattest section of brisket, it is sometimes referred to as the deckle. The “point” section is made up of muscle and fat that connects to the flat.
In simple terms, the flat that is also known by the name “first cut”, is the tiniest portion of the brisket. It’s called “flat” because it has the deckle (fatty portion) removed, giving it a flat surface that lets the meat sit upright.
Both have different textures, but when they’re smoked correctly they can provide lots of delicious flavor despite different fat compositions.
Which side is going to be on the Brisket?
In general, as a guideline, the layer that has the fat portion, also known as the “fat cap”, is the top of the brisket. While the “bottom” is where you will find the majority of the visible muscles and some fat.
When cooking the brisket it is essential to trim away the excess fat and then cut off the meat to ensure that it cooks evenly and all the seasonings are able to be evenly and thoroughly all over the meat.
There are various degrees of the amount of fat you must cut, but in the majority of informal BBQ circumstances, you can manage to trim just some pounds!
Here are some details about the steps needed to prepare:
At the end of the day, you’ll be left with a beautifully-carved the brisket, which has 1/8 inches fat caps on the sides and the top as well as a smooth and even bottom!
Get rid of all the hard fat as it cannot be used to make sausages or stocks, but retain some fat as well as silver skin to reuse in any way you want!
Overall If you start with a 10-pounder, and after cutting away all of the fat and trimming the excess fat, you could end up with a brisket weighing less than 7 pounds!
Once you’ve squared your meat off, it’s time to spice it!
These are the key steps to season your brisket correctly:
When everything is done You might believe that all you need to do is to throw the brisket in the smoker and let it cook you think? It’s not that simple!
In the beginning, you’ll need to choose the best cooking method.
If you’re using a wood smoker, you’ll have to alter your cooking method. Similar to that, when you decide to cook with an electric smoker, you’ll need to alter some cooking parameters.
For propane, hardwood, or charcoal smokers, always place the meat turned upside down in order that the fat cap is facing downwards. This will keep your meat from being burned due to the deflector plate and burner and ensure that the brisket is cooked evenly.
For pellet or electric smokers, you can store the meat in the fat cap placed on the top. It is important to vent the cooking chamber at least every 2 hours.
The release of steam allows you to regulate the cooking speed and keep the flavor of the bark (cooked condiments) without overly saturating it.
Pro Tips: Always place the fat side toward the source of heat to prevent the other briskets from overcooking or drying. Do not fret about the kind of wood you use for smoking brisket, either. It is possible to choose old-fashioned hickory for the majority of backyard smoking activities.
We’re halfway to the end! We have cut the meat, seasoned the brisket, and selected the most efficient method to cook it.
Next, you must mentally prepare and prepare physically for the long-term. And the most crucial step: smoking the Brisket!
As mentioned above smoking a brisket could take between 30 and 60 minutes for each pound. To ensure that we suggest calculating the total cooking time using one hour as the standard cooking time per pound.
That means that a 10-pound Brisket can take up to approximately 10 hours for smoking however, that’s only the first step in making it cook! Remember, the brisket could require up to 12-14 hours to cook.
This is the break-down of every stage:
| Preparation Stage | Time |
| Trimming | From 30 mins until 1 hour |
| Seasoning and marinating | From 30 mins to eight hours |
| Cooking Stage | Cooking Time |
| Smoking | 10 hours |
| Smoking and wrapping | 2 hours |
| Testing and resting | 2 hours |
As briskets can consume a whole day, it is best to prepare in advance. The best method to accomplish this is to cook the meat the day prior and cook it at dawn.
Certain enthusiasts might be content to wake up at 4 am – however for the average person and BBQ enthusiasts who are casual the best time to begin the cooking process are between 7 and 8 am.
This is the best beginning time since you’ll have the Brisket prepared prior to dinnertime or even at midnight.
The ideal temperature to cook Brisket is between 225-250degF. Maintaining the temperature in between these two temperatures allows for the meat to be able not just to cook, but also to develop incredible flavor and bark.
Remember that the cooking time and temperature do not have to be in inverse proportion as you may think.
The reason behind this is that the brisket will initially smoke for 7-10 hours without a cover. Then you will wrap it up in foil and butcher paper and cook for another two hours (more about this later).
You can turn the heat to 300 degrees however, this could seriously harm the flavor and quality of the meat. It would be unwise for those who are just beginning cooking briskets yourself at home.
Be safe and stick with 225degF for the most enjoyable experience. If you choose to cook at 300degF, you might need to alter the time of cooking accordingly.
Below is a table of the cooking times for every temp zone:
| Temperature | Smoking Time |
| 225-250degF | 8-10 hours of smoking without the wrap and then 2 hours of cooking in a wrap. * |
| 275-300degF | 5 hours of smoking unwrapped then 3-4 hours cooking using the wrap. * |
| 325-350degF | 3 hours of smoking wrapped in a wrap, and then four hours of cooking wrapped in a wrap. * |
*Estimated cooking time. Actual cooking time will be contingent upon the grade of the meat trimming, the quality of trimming, and the heating performance of the cooking appliance.
The most effective way to ensure you get an exquisitely juicy and smoked brisket can be cooked the brisket at 225degF, following the timings for each stage.
Sure you can heat up your grill but if your don’t know the basics, then there’s no way to ensure that your Brisket!
Whatever method of preparation and time you select, be sure that you adhere to the test to ensure an excellently cooked Brisket.
Here’s how to smoke Brisket!
If you prefer watching videos, take a look at this amazing instructional video from the Dawgfatha’s BBQ on YouTube.
It is the final stage of your cooking procedure. The resting phase is also part of the cooking process as you’ll need to let the meat air dry for 15 minutes prior to putting it in a refrigerator for at least 1 to 2 hours.
The release of steam can help stop the brisket from becoming too cooked when it is inside the refrigerator!
A cooler can be the ideal container for cooking brisket as it is protected. It keeps the brisket warm as well as slowly reduces the temperature, allowing the meat to absorb the juices.
Remember that the brisket expels all the juices of the meat during cooking However, once it cools, it starts to drain all the juices back into the middle.
After the resting time of 2 hours All that’s left is to cut the brisket, and then enjoy the results of your work!
If you are thinking that it’s too much work it could be. But think about this: Brisket is a labor of love, not a fast meal that can be prepared in a matter of hours. It’s an art form that requires patience and time.
We can assure you that all this effort will be worth it. Follow these steps and continue to practice until cooking brisket is effortless! You’ll likely sharpen your BBQ skills as well!
Here are some important tips you can apply to smoke a more Brisket!
The process of cooking a brisket can be described as an exciting trip. It’s not without challenges and pitfalls but the final result will always be worth the time and effort!
Now knowing how long to smoke Brisket, here are a few related questions:
Yes. Even though it’s not as succulent and juicy but if you’re on the go, it is possible to take a break for 15-30 minutes instead of two hours.
Keep the brisket covered so that it keeps the meat as moist as you can while it rests.
No. Don’t leave the brisket in the refrigerator for more than 2 hours. Although the cooler can be an ideal storage area for the brisket that is hot, however, it is best to limit the time you can store it to a maximum of 3-4 hours.
The brisket begins its descent into the danger zone temperature, which can cause it to be compromised because of bacterial growth.
Yes. If you are able to finish your meal late and you want for brisket to be served the next day, then put the brisket into the refrigerator with foil.
It is not necessary to air-condition the brisket during this process since the refrigerator gradually brings lower the temperature, but without degrading any quality or quality.
The brisket is cooked inside the oven (with the foil and butcher paper on) at between 250 and 300 degrees F. Then, reheat till the internal temperature has reached 160degF.
It is then allowed to air out for 15 minutes, taking the foil removed, then cover it again and let on the meat 15-30 mins at room temperature prior to serving!


